
2026
How to Use Maket: Design Your Home from Idea to 3D
Learn 3 ways to start a Maket project: generate with AI, draw from scratch, or upload a floor plan. Step by step guide inside.

Caroline Boulard
Head of Growth
Last updated: June 8, 2026
Maket is an AI-powered design platform enabling homeowners to create residential floor plans quickly. The app allows users to generate new layouts, edit existing plans (upcoming feature), and view photorealistic visualizations all within one workspace.
New to AI floor plan generation? Here's a broader overview of how AI tools work and what to expect.
Here is how it works.
Note: Maket is evolving fast. New features and improvements are released regularly, so some steps or interface details in this guide may change over time. We will keep this page updated as the platform grows.
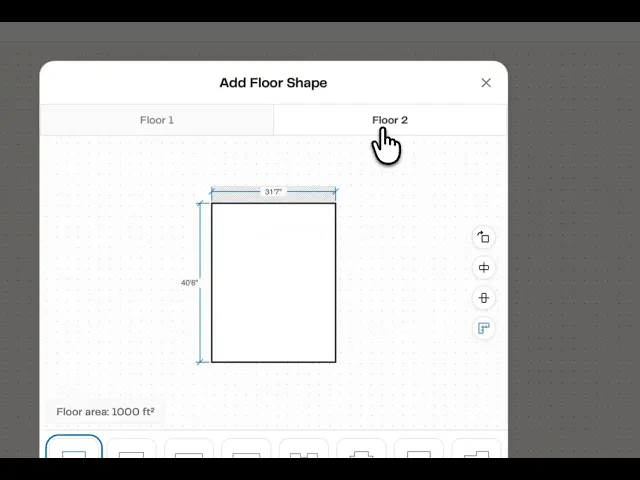
Step 1: Create your floor plan
Maket offers three ways to start your floor plan: generate from a prompt, draw from scratch, or upload an existing plan:
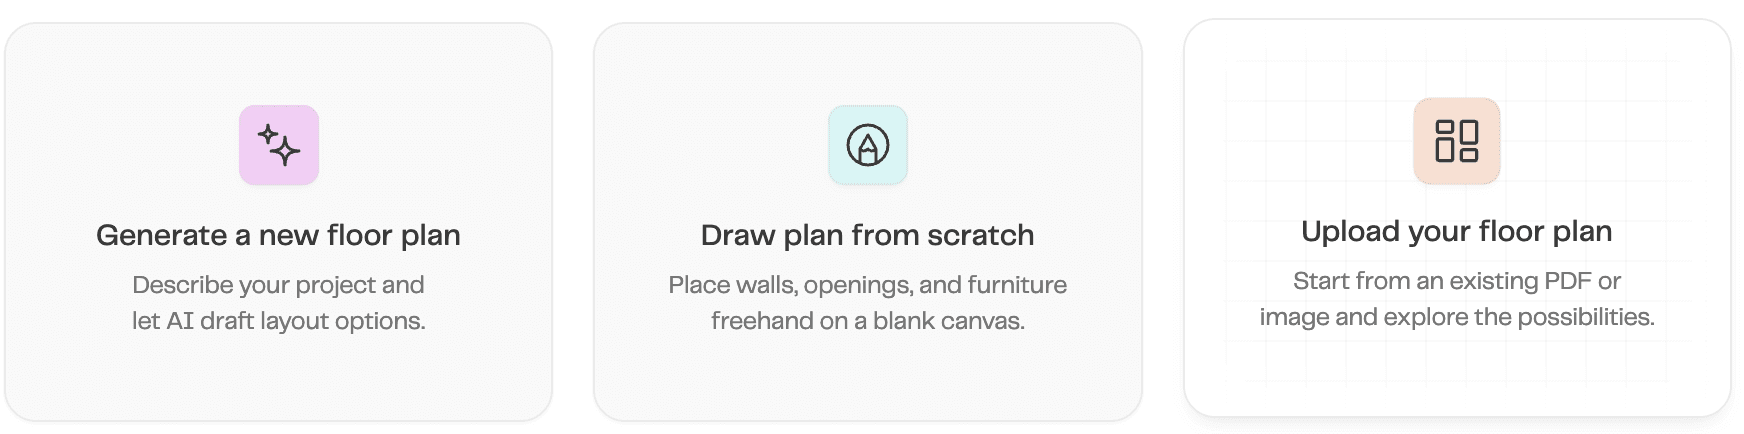
Option 1 — Generate a new floor plan
Best for: when you're not sure where to start, or you want quick inspiration on layout options
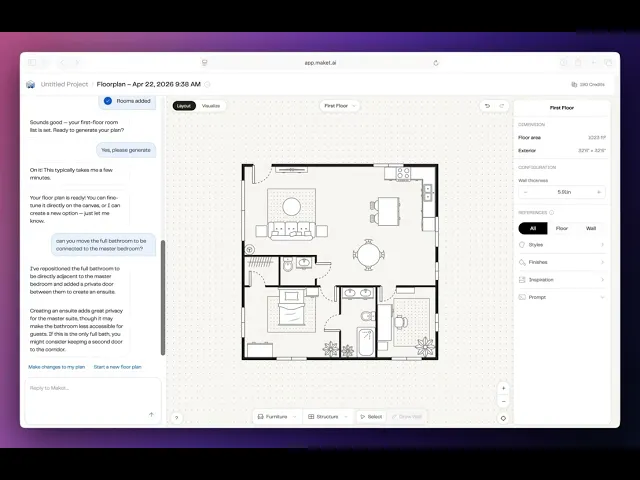
Follow Maket's guided steps in the chat (floors, area, shape, rooms) and it generates a complete floor plan in minutes, with doors, windows, and furniture included.
💡 Tip: stick to the guided flow rather than pasting a free-form prompt for the best result.
Option 2 — Draw from scratch:
Best for: designing a single room, a studio, an open-concept area, or a small space like a backyard office, with full control over your layout.
Use the wall tool to sketch your floor plan, then assign room types. Once a room is closed, you can ask Maket to add or complete what you'd like (bedrooms, bathrooms, kitchen, etc.), and it builds the rest of the layout based on your input.
Want to go deeper? Read our full guide on how to draw a floor plan from scratch
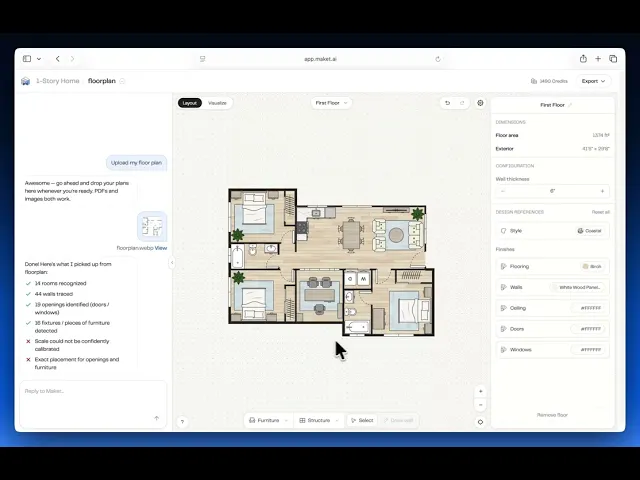
Option 3 — Upload an existing plan (Available only on Plus Plan) NEW:
Best for: adjusting an existing plan for renovations, additions, or new configurations.
Drop in a PDF, JPG, or PNG of your floor plan and Maket rebuilds it as a fully editable design in a minute.
Available on our Plus plan (see pricing page for more information)
Curious how it works? Read our guide on how to upload an existing floor plan
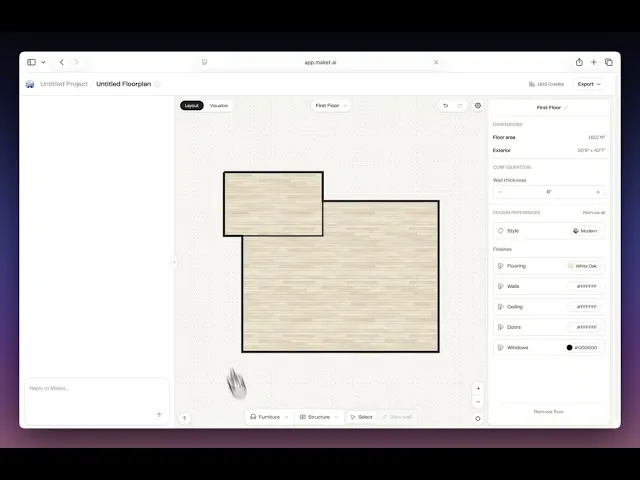
Step 2: Edit your layout
Once your plan is generated, you have two ways to edit it.
Agentic editing (chat-based):
Describe changes in the chat and Maket applies them to your floor plan. Treat it like a conversation with an architect: one change at a time, see the result, ask for the next.
Examples that work well:
"Make the kitchen 20% bigger"
"Add a powder room near the entry"
"Flip the floor plan 180°"
"Swap the bedroom and the office"
💡 Tip: avoid long combined prompts. One change at a time gives faster, more accurate results. If you want to learn more about this feature, you can read the full guide here.
Manual editing on the canvas:
Walls and rooms: Resize by dragging handles, move or delete walls, or draw new walls.
Structure: Add doors, windows, and stairs from the Structure menu.
Furniture: Browse or search the catalog, then drag into rooms. (Furniture is canvas-only, not through chat.)
Switch between chat and canvas anytime. Use the floor selector for multi-story plans. Undo/redo always available. Select any item to see its measurements in the inspection panel.

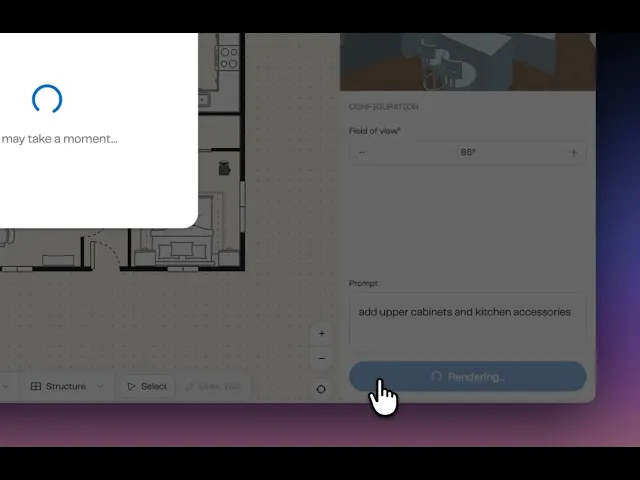
Step 3: Visualize in 3D and Style Your Space
Switch to Visualize mode to bring your floor plan to life. Customize your space at the level of detail you want, from a broad style reference down to individual elements.
Add style references
From Maket's library: Choose a style direction (modern, farmhouse, Scandinavian, etc.) or pick specific finishes (materials and colors).
Your own inspiration: Upload an image from Pinterest or a design blog, or describe what you want in a text prompt.
References can be applied to an entire floor or a specific room. NEW: for more granular control, customize individual elements like wall colors, furniture finishes, doors, and flooring.
Rendering
Cameras appear on your floor plan in Visualize mode. Click any camera to adjust its position and angle. The 3D preview updates live as you move. Click "Render scene" to generate a photorealistic image. Add extra direction in the prompt field before rendering ("add curtains", "change the flooring to oak", "include kitchen accessories").
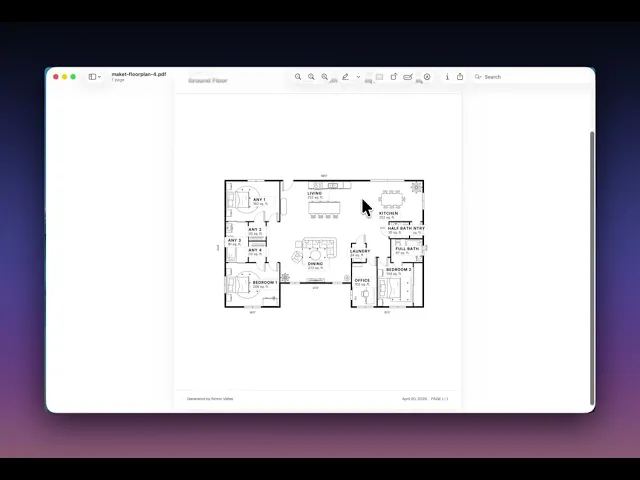
Step 4: Export and Share (Available only on Plus Plan)
Export your floor plans as DXF files for architects and CAD workflows, or as PDF for sharing with clients, contractors, and family.
Pricing
Maket is free to try with 50 credits, no credit card required. The Plus plan starts at $20 USD per month for 300 credits, with Floor Plan Upload included. Credits refresh monthly: each floor plan generation uses 20, each render uses 10. See the pricing page for details.
Need help? Reach out via in-app chat or check our FAQ and help center.
Frequently asked questions
Is Maket free to try?
Yes. Start with our free trial, no credit card required. The free plan covers floor plan generation, editing, and 3D visualization. Some advanced features like Floor Plan Upload are on our Plus plan. See pricing page.
What's included in the free plan and the Plus plan?
The free plan includes 50 credits to explore floor plan generation, editing, and 3D visualization (no credit card required). The Plus plan ($20/month, 300 credits) adds Floor Plan Upload, more credits, and other advanced features such as Exports. See pricing page.
What are the 3 ways to start a project in Maket?
You can (1) generate a floor plan from a text prompt using our guided chat, (2) draw your plan from scratch with the wall tool, or (3) upload an existing floor plan (PDF, JPG, or PNG) and let Maket recognize the rooms automatically.
Can I upload my own floor plan to Maket?
Yes. Floor Plan Upload is available on our Plus plan. Drop in a JPG, PNG, or PDF and Maket recognizes the walls, doors, and windows within a minute. You can then move walls, add or remove rooms, or ask Maket to update the layout with a text prompt. See pricing page.
How accurate is the Floor Plan Upload feature?
Maket recognizes walls, doors, and windows from most residential floor plans within a minute. Accuracy varies depending on the source quality and complexity. You can always adjust the recognized layout manually before editing or rendering.
How do I draw a floor plan from scratch in Maket?
Open a new project and select Draw from Scratch. Use the wall tool to sketch your floor plan. Once a room is closed, you can ask Maket to add or complete what you'd like (bedrooms, bathrooms, kitchen, etc.), and it will build the rest of the layout based on your input.
Can I edit my floor plan using a text prompt?
Yes. Maket supports agentic editing through the chat. Describe what you want to change ("make the kitchen 20% bigger", "add a powder room near the entry"), and Maket applies the change directly to your floor plan. For best results, request one change at a time.
Can I export my floor plan to PDF, DXF, or DWG?
Yes. You can export your floor plan as a PDF, DXF, or DWG file to share with your architect, builder, or contractor. Export is available on our Plus plan. See pricing page.